
Table of Contents
- Why Regular Maintenance of Propane Appliances Matters
- Step 1: Perform Monthly Visual Inspections
- Step 2: Check for Gas Leaks Using the Soapy Water Solution
- Step 3: How to Read Propane Tank Gauge and Monitor Levels
- Step 4: Clean Burner Orifices and Remove Soot Buildup
- Step 5: Verify Ventilation and Flue Gas Management
- Signs of Propane Appliance Malfunction and When to Stop DIY Work
- Propane Tank Maintenance Schedule and Professional Inspection Timeline
Last Updated: August 30, 2026
Why Regular Maintenance of Propane Appliances Matters
Propane appliances power everything from home heating to kitchen ranges, but they require consistent maintenance to stay reliable. Neglect invites efficiency losses, safety hazards, and expensive repairs. Small gas leaks go unnoticed for weeks, soot accumulates inside burners, and tank corrosion develops slowly. Regular maintenance catches these problems before they escalate.
This guide walks you through seven essential steps to maintain propane appliances safely and effectively.
Step 1: Perform Monthly Visual Inspections
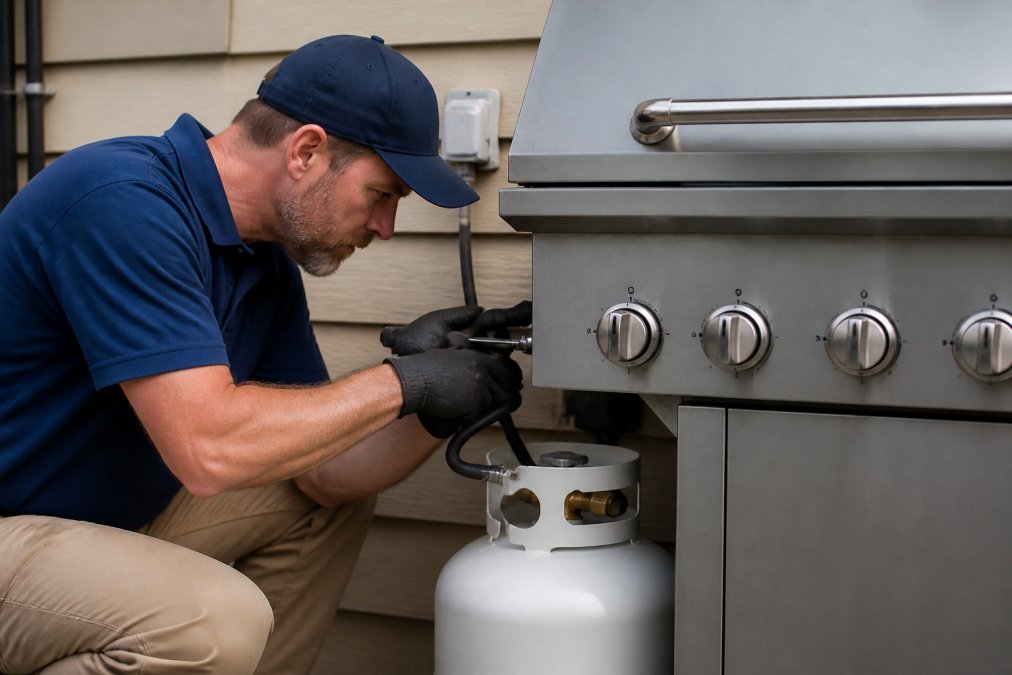
A quick monthly visual inspection takes ten minutes and reveals most common problems. Look for obvious damage: cracks in the appliance body, rust or corrosion on visible surfaces, loose connections, or anything out of place. Check the area around your appliance for debris, combustible materials, or obstructions that could interfere with ventilation. Pay special attention to control knobs and ignition switches, they should turn smoothly without sticking. The pilot light, if present, should burn with a steady blue flame, not yellow or orange.
What to Look For During Inspections
Document what you see by taking photos or noting observations to spot trends. Look for water pooling around the appliance base, which indicates a condensation or leak problem. Check that all visible gas supply lines are intact and securely connected. Flexible hoses should show no cracks, kinks, or deterioration.
Step 2: Check for Gas Leaks Using the Soapy Water Solution
Gas leaks are the most serious propane safety concern. Mix a few drops of dish soap with water in a spray bottle. Apply the solution to all visible gas connections, joints, and fittings on your propane appliance. If a leak exists, bubbles will form and grow at that location as gas escapes.
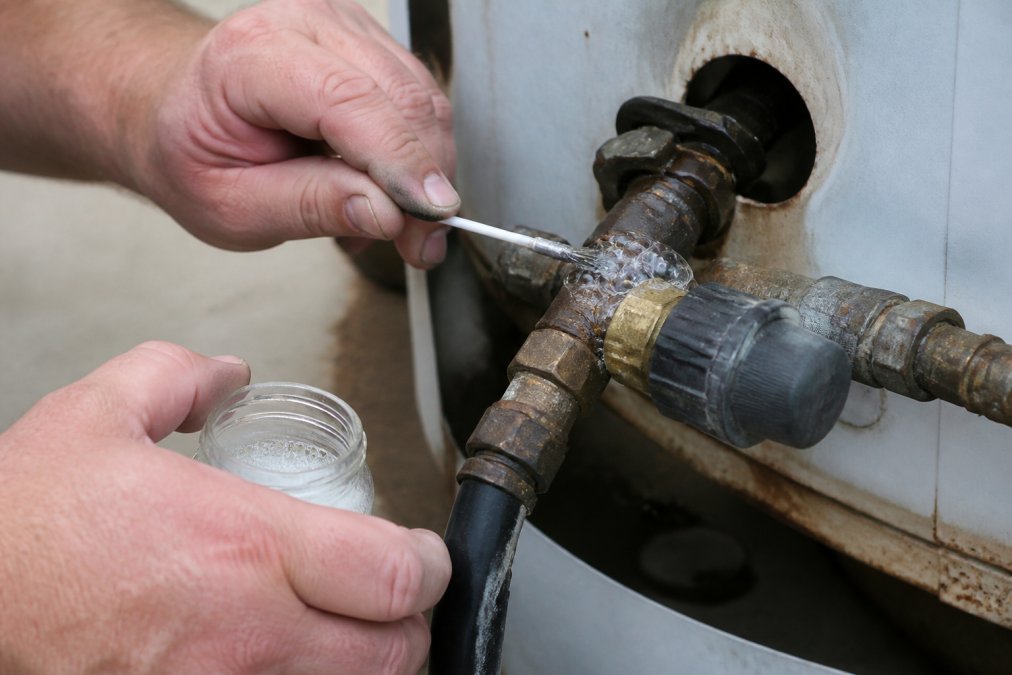
Do this test monthly or whenever you suspect a leak. If you detect bubbles, stop using the appliance immediately. Shut off the gas supply valve, open windows to ventilate the area, and call a professional technician. Never attempt to tighten or repair a leaking connection yourself.
Step 3: How to Read Propane Tank Gauge and Monitor Levels
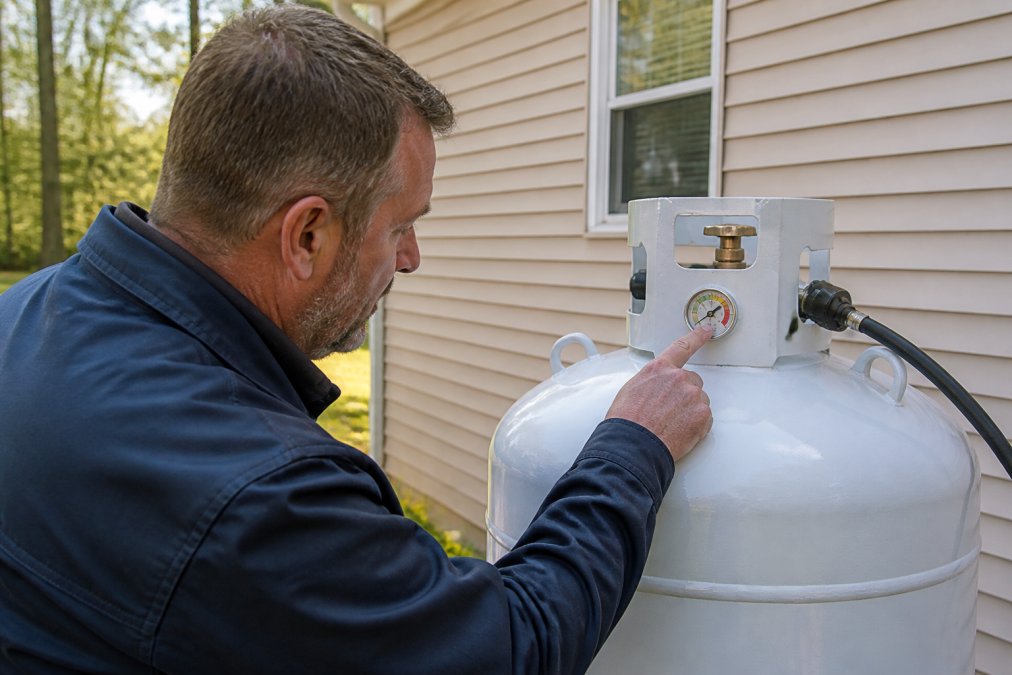
Understanding your propane tank gauge prevents running out of fuel. Most residential propane tanks have a dial gauge on top showing the fuel level as a percentage. A full tank reads at 100 percent. Most propane suppliers recommend scheduling delivery when your tank drops to 20-30 percent (nfpa.org). Check your gauge monthly, especially during heating season when consumption increases. Winter usage can drop your tank from 80 percent to 30 percent in just a few weeks. With Discount Propane’s easy online ordering and flexible delivery options, you can schedule refills without stress.
Step 4: Clean Burner Orifices and Remove Soot Buildup
Soot accumulation inside burner orifices reduces combustion efficiency and can create safety hazards. Ensure the appliance is completely cool and the gas supply is shut off. Remove the burner grate or cap if your appliance design allows it. Use a soft brush or compressed air to gently remove loose soot and debris. For stubborn deposits, mix baking soda with a small amount of water to create a paste, apply it to the burner orifices, and let it sit for a few minutes. Gently wipe away the paste with a soft cloth, rinse thoroughly with clean water, and allow to dry completely before reassembling.
Cleaning Supplies You’ll Need
Gather these items: soft-bristled brush, compressed air canister (optional), baking soda, clean cloths or paper towels, small bowl for mixing, and safety glasses. Never use metal scrapers or harsh abrasive pads on burner orifices, as these can damage the precision openings that control gas flow. After cleaning, reassemble carefully and test the appliance. The flame should burn blue and steady, not yellow or flickering.
Step 5: Verify Ventilation and Flue Gas Management
Proper ventilation is critical for safety and efficiency. Propane appliances produce flue gases that must exit your home safely. Inspect the vent pipe or flue that carries exhaust gases outside. Look for visible blockages, damage, or separation in the ductwork. Make sure nothing is covering the exterior vent opening. Check that the vent pipe slopes properly if applicable to your appliance type. Most vent systems should slope slightly downward toward the outside to prevent condensation from draining back into the appliance. Ensure adequate fresh air supply to the room where your propane appliance operates.
Signs of Propane Appliance Malfunction and When to Stop DIY Work
Knowing the difference between a minor maintenance issue and a serious malfunction keeps you safe and prevents costly mistakes.
Common Malfunction Symptoms and What They Mean
Yellow or orange flame instead of blue: This indicates incomplete combustion. A blue flame indicates proper gas-to-air ratio and complete burning (the CDC). Yellow or orange flames mean either too much gas, too little air, or carbon buildup in the burner. Stop using the appliance and call a technician, incomplete combustion produces carbon monoxide.
Appliance won’t ignite or ignites intermittently: If your propane appliance fails to light after two or three attempts, don’t keep trying. Repeated ignition attempts can allow unburned gas to accumulate in the combustion chamber, creating a safety hazard (cpsc.gov). Shut off the gas supply and contact a professional.
Rotten egg or sulfur smell: Propane itself is odorless; the distinctive rotten egg smell is an odorant added by suppliers for safety. If you smell this near your appliance or tank, a gas leak is present. Evacuate the area immediately, do not use any electrical switches or create sparks, and call your propane supplier’s emergency line or 911.
Unusual noises (popping, banging, or hissing): Occasional pops during ignition are normal, but sustained popping, loud banging, or continuous hissing indicate problems. Turn off the appliance and call a technician.
Pilot light won’t stay lit or burns yellow: If your appliance has a pilot light, it should burn steadily with a blue flame. A pilot that won’t ignite, goes out repeatedly, or burns yellow suggests a thermocouple failure, gas supply problem, or air intake blockage.
Carbon monoxide detector activation: If your home’s carbon monoxide detector sounds an alarm, treat this as an emergency. Evacuate your home immediately, get to fresh air, and call 911.
Thermostat not responding or temperature won’t hold: If you adjust the thermostat and the appliance doesn’t respond, or if the temperature fluctuates wildly, the thermostat sensor or control board may be failing. This is a professional repair.
Water pooling or dripping from the appliance or vent: Condensation is normal in some cases, but pooling water indicates a ventilation problem, a blocked drain, or a heat exchanger issue. Stop using the appliance until a technician inspects it.
DIY Maintenance vs. Professional Service: Clear Boundaries
What homeowners can do:
- Visual inspections for obvious damage, corrosion, or loose connections
- Monthly soapy water leak tests on visible connections
- Gentle cleaning of burner orifices with soft brushes and baking soda
- Clearing debris from vent openings and air intake vents
- Checking and documenting tank gauge readings
- Replacing thermostat batteries (if applicable)
- Tightening loose control knobs or handles (hand-tight only, no tools) cleaning outdoor grills.
What requires a certified technician:
- Any work involving the gas supply line, regulator, or pressure connections
- Replacing or repairing thermocouples, igniters, or control boards
- Adjusting gas pressure
- Repairing or replacing vent pipes or flue systems
- Any internal combustion chamber work
- Diagnosing or repairing leaks
- Installing or relocating an appliance
- Servicing the propane tank itself
Many states require propane work to be performed by a licensed technician. Attempting repairs outside your scope can void appliance warranties, violate local codes, and create serious safety hazards.
When to Call Immediately vs. When to Schedule an Appointment
Call immediately (emergency service):
- You smell rotten eggs or sulfur
- Your carbon monoxide detector is sounding
- You see visible gas leaks (bubbles from soapy water test)
- The appliance produces a loud banging or hissing sound
- You suspect a gas leak but can’t locate it
Schedule an appointment (within a few days):
- Pilot light won’t stay lit
- Flame is yellow or orange
- Appliance won’t ignite
- Thermostat not responding
- Water pooling around the appliance
- You notice a change in appliance performance or efficiency
A certified technician can diagnose problems quickly using specialized equipment like combustion analyzers, pressure gauges, and leak detectors.
Propane Tank Maintenance Schedule and Professional Inspection Timeline
Consistent maintenance prevents emergencies and extends appliance lifespan. Maintenance needs shift with the seasons, winter demands differ dramatically from summer.
Year-Round Monthly Maintenance
These tasks apply every month:
- Visual inspection: Check all propane appliances for visible damage, corrosion, loose connections, or debris around the appliance.
- Soapy water leak test: Apply soapy water to all visible gas connections and joints. Bubbles indicate a leak requiring immediate professional attention.
- Tank gauge check: Record your propane tank’s fuel level to create a consumption pattern for predicting delivery needs.
- Pilot light check (if applicable): Confirm the pilot burns with a steady blue flame, not yellow or orange.
- Vent opening inspection: Make sure nothing is blocking the exterior vent opening where flue gases exit your home.
Seasonal Maintenance: Summer Schedule (May-August)
Summer is ideal for preventive work because you’re not depending on your propane appliances for heating.
June or July:
- Deep burner cleaning: Remove burner grates and clean orifices thoroughly with soft brushes and compressed air.
- Vent system inspection: Check the entire vent pipe from the appliance to the exterior opening for damage, separation, or debris.
- Outdoor tank inspection: If your tank is outside, inspect it for rust, corrosion, or damage. Ensure the tank is secure and level.
August:
- Schedule your annual professional inspection: Contact a certified technician to perform a comprehensive inspection before September. This ensures any problems are identified and fixed before heating season.
- Tank pressure test: Ask your technician to verify that your propane tank’s safety relief valve is functioning correctly.
- Appliance efficiency check: A technician can measure combustion efficiency and confirm your appliance is burning propane completely and safely.
Seasonal Maintenance: Winter Schedule (November-March)
Winter is when propane appliances work hardest, so vigilance is critical.
November:
- Professional inspection completion: If you haven’t already scheduled your annual inspection, do it now.
- Tank delivery schedule: Confirm with your propane supplier that they have your address and phone number and agree on a delivery schedule.
- Thermostat testing: If you use a propane furnace or space heater with a thermostat, test it thoroughly.
- Emergency shut-off valve location: Locate your propane tank’s main shut-off valve and confirm you know how to operate it.
December-February:
- Increased gauge monitoring: Check your tank gauge weekly during the coldest months.
- Vent opening clearance: After snow or ice storms, inspect your exterior vent opening and clear any blockages immediately.
- Appliance performance: Pay close attention to how your heating system performs. If it’s running constantly but not reaching your set temperature, call a technician.
- Carbon monoxide detector testing: Test your carbon monoxide detector monthly and replace batteries if needed.
March:
- Post-season inspection: Once heating season winds down, have a technician perform a brief inspection to identify any wear or damage that occurred during heavy winter use.
- Tank inspection: If your tank is outside, inspect it for any damage or corrosion that developed during winter weather.
Annual Professional Inspection Checklist
A certified technician performing your annual inspection should verify all of these items and provide written documentation:
- Gas pressure at the appliance: Pressure that’s too high or too low reduces efficiency and can damage components.
- Combustion efficiency: Using a combustion analyzer, the technician measures how completely your appliance is burning propane.
- Flame pattern and color: The flame should be blue and steady, not yellow, orange, or flickering.
- All connections secure and leak-free: Every joint, fitting, and connection is tested for leaks using specialized equipment.
- Vent system clear and properly configured: The vent must slope correctly, have no blockages, and be properly sealed.
- Carbon monoxide levels: The technician measures CO levels near the appliance and in your home to ensure they’re safe.
- Thermostat operation and accuracy: The thermostat should respond to adjustments and maintain the set temperature.
- Safety valve function: The pressure relief valve on your tank is tested to confirm it operates if pressure becomes dangerous.
- Pilot light (if applicable): The pilot ignites reliably and burns with a steady blue flame.
- Overall appliance condition: The technician inspects for corrosion, damage, or wear that could affect safety or performance.
Ask your technician to provide a written report documenting all findings, any repairs made, and recommendations for future maintenance. Keep these reports in a file, they create a history of your system’s health and help you spot recurring issues.
Propane Tank Storage and Outdoor Maintenance
If your propane tank is stored outdoors, include these tank-specific tasks in your seasonal schedule:
Spring and fall:
- Inspect the tank exterior for rust or corrosion. Surface rust can be cleaned with a wire brush, but deep pitting or holes require professional tank replacement.
- Ensure the tank is level and secure. A tilted tank can cause liquid propane to enter the gas line, creating safety hazards.
- Check that the tank’s safety relief valve cap is in place and not corroded.
- Trim vegetation growing around the tank.
After winter:
- Inspect for damage from snow, ice, or salt exposure.
- Check that the tank’s paint or protective coating isn’t peeling.
Creating Your Personal Maintenance Calendar
Write down your maintenance schedule and set phone reminders for key dates:
- First of every month: Perform visual inspection, leak test, and gauge check.
- June or July: Deep cleaning and vent inspection.
- August: Schedule annual professional inspection.
- November: Confirm heating season readiness and delivery schedule.
- Weekly in winter: Check tank gauge during cold months.
- March: Post-season inspection.
Consistency is more important than perfection. Establishing a rhythm ensures you catch problems early and avoid the stress of emergency repairs.
Frequently Asked Questions
How often should propane appliances be professionally inspected?
Professional inspection of propane appliances should occur annually, ideally before the heating season begins. A certified technician will check gas pressure, test for leaks, verify proper combustion efficiency, and ensure all safety components like thermocouples and pilot lights function correctly. This annual inspection catches issues early and extends appliance longevity. Between professional visits, perform monthly visual checks yourself for obvious problems like corrosion or debris.
What are the signs of a propane leak in an appliance?
Signs of propane leaks include a strong rotten-egg odor (propane is odorless but utilities add this odorant), hissing sounds near connections, yellow or orange flames instead of blue, soot accumulation around burners, and carbon monoxide detector activation. If you suspect a leak, shut off the appliance immediately, open windows for ventilation, and leave the area. Use a soapy water solution on connections to confirm leaks, bubbles indicate escaping gas. Call a certified technician or your propane supplier to repair the issue.
How long can propane sit in a tank and still be good?
Propane itself doesn't expire, but stored propane can degrade if the tank isn't maintained properly. Moisture inside the tank causes corrosion and reduces fuel quality. Tanks should be stored upright in dry conditions and inspected annually for rust or damage. If a tank sits unused for more than a year, have it professionally inspected before use. Proper storage prevents moisture accumulation and keeps your propane supply safe and functional for years.
What is the 80/20 rule for propane?
The 80/20 rule is a safety standard for propane tank filling: tanks are filled to only 80% capacity, leaving 20% headspace for propane gas expansion as temperatures change. This prevents dangerous overpressurization and potential tank rupture. When you order propane delivery, technicians follow this rule automatically. Never attempt to overfill a tank yourself. This rule applies to all propane tank sizes and is enforced by federal safety regulations to protect your home and appliances.
This article was written using GrandRanker