
Table of Contents
- Why Oil Tank Leaks Matter on Long Island
- Signs of an Underground Oil Tank Leak
- How to Find a Buried Oil Tank on Your Property
- Underground Oil Tank Inspection Methods That Work
- What to Do If You Suspect a Leak
- Oil Tank Leak Cleanup and Remediation
- Distinguishing a Real Leak from Normal Tank or Heating System Issues
- Frequently Asked Questions
Last Updated: October 12, 2026
Why Oil Tank Leaks Matter on Long Island
Underground storage tanks corrode over time, and when they fail, heating oil contaminates soil and groundwater. Long Island sits on sensitive aquifers supplying drinking water to thousands of homes and businesses, so a leaking tank creates risks beyond your property line.
Cleanup can reach tens of thousands of dollars, since remediation requires professional assessment, soil sampling, and often tank removal, and insurance may only cover part of it.
This guide covers the signs, testing methods, and next steps for detecting oil tank leaks.
Signs of an Underground Oil Tank Leak
Watch for these warning signs, some obvious, others subtle.
Oil Odors and Unusual Smells
A strong fuel oil smell around your property is the first red flag. You might notice it near the tank, in your basement, or in your yard after rain, even if the leak is small.
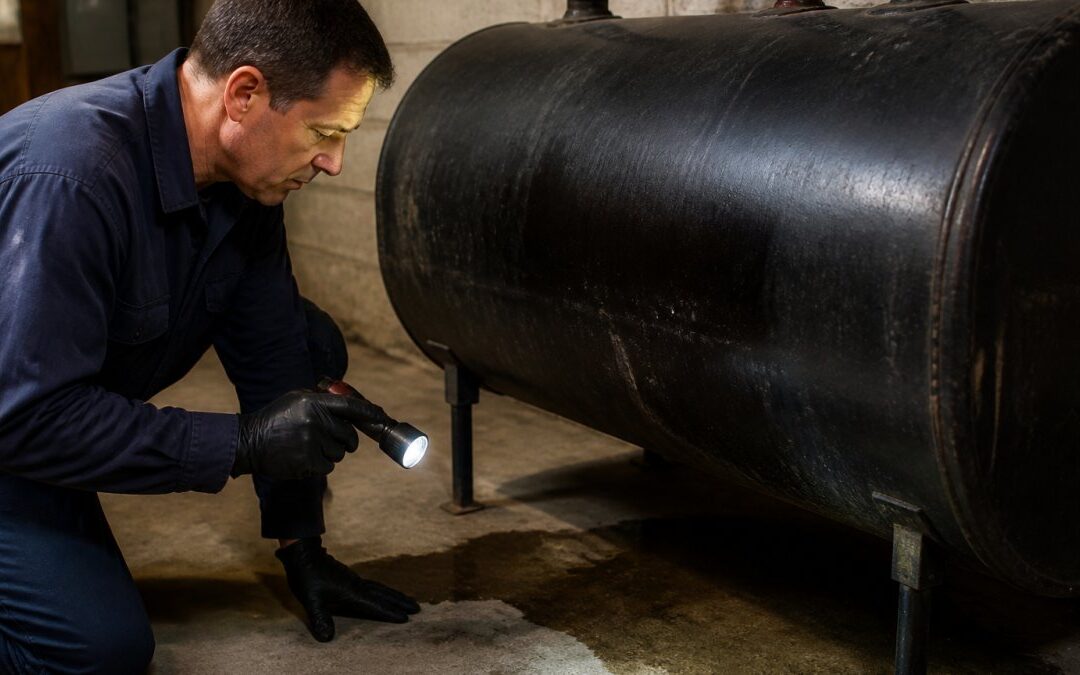
Wet Spots and Oil Stains Near Your Tank
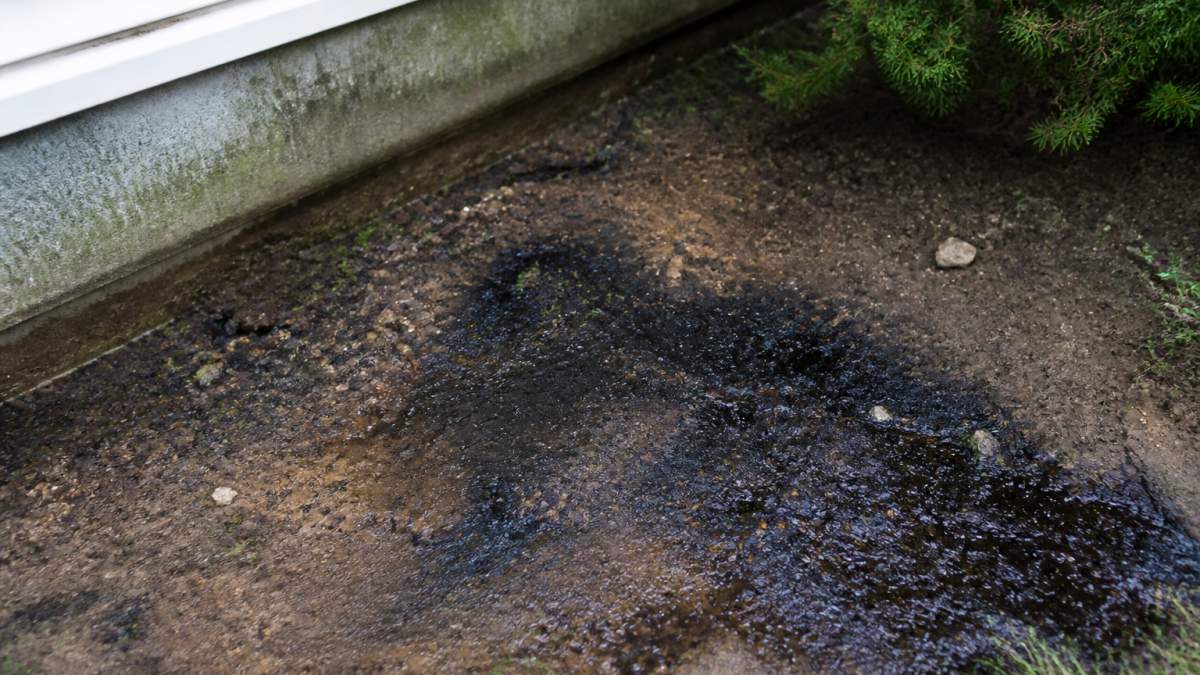
Check the ground around your tank for dark stains or wet patches. Oil leaves visible residue on soil, fresh and dark or old and faded brown.
Wet spots that don’t dry after rain, or damp soil in summer, suggest active leaking. Walk the area regularly, especially after heavy rain.
Changes in Heating Oil Usage or Tank Levels
Monitor your fuel oil usage. If your tank empties faster than it should, track your delivery dates and order amounts.
Compare usage year-to-year: a sudden spike means your heating system needs service or your tank is leaking. Call your fuel oil company to review your history.
How to Find a Buried Oil Tank on Your Property
Not all homeowners know where their tank sits. Tanks are often buried 3-4 feet underground, hidden from view.
Start with your home’s paperwork, old inspection reports, property surveys, or permits often show tank location. Ask your neighbors, too.
Walk your property and look for:
- Soil that sinks or settles unevenly
- Pipes or vents sticking up from the ground
- Discolored patches of grass or dead vegetation
If you still can’t locate it, a professional can use ground-penetrating radar, which scans underground without digging.
Underground Oil Tank Inspection Methods That Work
Three testing methods can help you detect oil tank leaks and confirm whether your tank is leaking.
Tank Tightness Testing
A tank tightness test pressurizes your system and measures whether pressure holds steady (the EPA). If pressure drops, the tank has a leak.
A licensed technician monitors the equipment for 24 hours or longer. If the tank fails, you have proof of the leak.
Soil Sampling and Environmental Testing
Soil sampling detects oil contamination around the tank: a technician collects samples from multiple spots and sends them to a lab.
The lab measures fuel oil residue; if contamination is present, the test confirms leaking and shows how far it has spread, which determines cleanup scope.
Ground-Penetrating Radar (GPR) Scanning
GPR uses radio waves to image underground structures, showing the tank’s location, size, and condition without digging, and can sometimes detect corrosion or structural damage.
GPR is expensive but non-invasive. It’s useful if you need to know exactly where the tank is before deciding on removal or repair.
What to Do If You Suspect a Leak
A suspected tank leak is time-sensitive: heating oil spreads through soil and can reach the aquifers that supply drinking water here, so the sooner you act, the smaller the problem stays. The steps below go in priority order, safety, documentation, then professional response.
Step 1: Stop the Source and Remove Ignition Risks
- Stop using the tank. Do not order more fuel, and do not run the burner to “use up” what’s left.
- Do not open, tap, drill, or probe the tank, and do not dig around it to “check.” Disturbing a corroded tank or contaminated soil can spread the release and create a vapor hazard.
- Shut off the fuel supply at the tank valve if it can be reached safely.
Do not try to pump out, patch, or “seal” a leaking tank yourself. Homeowner repairs on a leaking tank are a common way a small release becomes an expensive one, and they can void insurance coverage.
Step 2: Document What You Observed
Before anyone arrives, write down what you saw and when. This record supports both the regulatory response and any insurance claim.
- Date and time you first noticed the symptom
- What you observed: odor, stain, wet soil, dead grass, dropping tank gauge, rising fuel bills
- Where you observed it, in plain terms (for example, “south side of house, 6 feet from foundation”)
Step 3: Notify the Right Parties
Reporting requirements are set at the state and county level, and a suspected home heating oil release is generally reportable. Homeowners typically notify:
- The county health department where the tank is located. County health departments administer the bulk of residential petroleum and water-supply programs in this region.
- The state environmental regulator’s spill hotline. The state operates a 24-hour spill reporting line for petroleum releases, and it is the standard first call for a confirmed or strongly suspected release.
- Your fuel oil supplier. They have your delivery history, which helps establish whether consumption actually changed, and can often recommend licensed contractors.
- Your homeowner’s insurance carrier. Report the suspected loss early. Most policies require prompt notice, and delay is one of the most common reasons a claim is denied.
When you call, have your address, the tank type and approximate size, what you observed, and whether anyone is currently using the tank. Ask for a case or spill number and write it down.
If you are not sure whether the situation rises to a reportable release, call anyway and ask. Regulators would rather field a question than respond to a release that sat unreported for weeks.
Step 4: Limit Exposure and Protect the Site
- Keep children, pets, and anyone with respiratory or skin sensitivities away from the affected area.
- Do not walk through, dig in, or garden in stained or odorous soil. Tracked soil spreads contamination and can carry residue indoors.
- Do not wash spilled oil into storm drains, and do not hose down a stained area to “clean” it. Water pushes oil deeper and can move it toward groundwater.
Step 5: Hire a Licensed Environmental Contractor
Testing, tank removal, and soil remediation are licensed activities. When you contact contractors:
- Ask for their license or certification number and verify it with the issuing agency.
- Ask for proof of general liability and pollution liability insurance, and confirm the policy covers fuel oil release work.
- Request a written scope that separates assessment (soil borings, lab analysis) from remediation (excavation, disposal, backfill).
A reputable contractor will not pressure you to skip assessment, will not offer to “just remove the tank” without sampling, and will put the scope and exclusions in writing.
Order of operations: stop the tank, remove ignition sources, document, report to the county and state, protect the site, then hire a licensed contractor. Skipping ahead to “find a company” before you report can cost you both time and insurance coverage.
Oil Tank Leak Cleanup and Remediation
Cleanup depends on contamination severity. Minor leaks may require soil excavation and disposal. Larger spills require extensive soil removal and sometimes groundwater treatment.
A professional environmental contractor will:
- Test soil to determine contamination extent
- Excavate contaminated soil
- Dispose of soil and oil properly
The process takes weeks or months, and costs vary widely with contamination size and depth. Contractors provide detailed estimates after initial assessment.
Distinguishing a Real Leak from Normal Tank or Heating System Issues
Most of the warning signs above have at least one innocent explanation. This section helps you tell the difference between a system problem, a weather artifact, and an actual release, so you spend money on the right fix and don’t ignore a real leak because it looked like something else.
Symptom-by-Symptom: What Else It Could Be
Fuel smell in the basement or near the tank
- Normal or system-related: A recent delivery can leave a faint odor for a day or two. A dirty or misfiring burner can produce a sharp exhaust smell through the flue area. A loose fill or vent cap can let vapor escape.
- Leak-related: A persistent fuel oil smell that does not fade, is strongest near the tank or in low spots, or that neighbors also notice. Odor that intensifies after rain is a strong leak indicator, because water pushes oil vapor up through soil.
Wet spot or dark stain near the tank
- Normal or system-related: Rain pooling in a low spot, a slow drip from a condensate line, or a shaded area that stays damp longer than the surrounding lawn.
- Leak-related: A stain that is dark, greasy, or has a fuel odor; a wet patch that does not dry out during a dry spell; a patch that reappears in the same spot after rain. Oil sheen on standing water is a clear leak sign.
Tank gauge dropping faster than usual
- Normal or system-related: Colder-than-normal weather, a new baby or home office adding heat demand, a thermostat left higher, a clogged burner nozzle, a dirty filter, air in the fuel line, or a failing burner that runs longer to hit the same temperature.
- Leak-related: Consumption that rises sharply with no change in weather or usage habits, especially paired with any odor or stain. A gauge that drops while the system is off is a strong leak indicator.
Dead or yellowing grass in a strip or patch
- Normal or system-related: Drought stress, grub damage, fertilizer burn, or a buried utility line that blocks roots.
- Leak-related: A strip or patch that follows the tank or fuel line, stays dead through watering, or is paired with a fuel odor or soft, sunken soil.
Rust on the tank
- Normal or system-related: Surface rust on the exterior of an aboveground tank is common and does not by itself mean the tank is leaking. Condensation inside a tank is also normal and does not indicate a release.
- Leak-related: Pitting, flaking, or weeping rust; rust at a weld seam or fitting; rust on the bottom of an aboveground tank, where water collects. For underground tanks, you cannot see rust at all, which is why soil sampling and tightness testing matter more than visual inspection.
Water in the tank or filter
- Normal or system-related: Condensation forms naturally as tank temperature changes, and small amounts of water are routine. A clogged filter or an untreated tank can hold more water than usual.
- Leak-related: Water entering from outside the tank, which usually means a compromised tank wall, a failed fitting, or a flooded fill pipe. Excess water accelerates corrosion and is a leading cause of underground tank failure.
A Simple Decision Rule
Ask three questions in order:
- Is there a fuel odor? If yes, treat it as a potential release until a professional says otherwise. Odor is the single most reliable homeowner-observable sign.
- Is there a persistent stain, sheen, or dead vegetation patch that follows the tank or fuel line? If yes, schedule soil sampling.
- Did consumption change with no weather or usage explanation? If yes, have the heating system serviced first. If service does not fix it, move to tank testing.
If the answer to all three is no, you likely have a system or weather issue, not a leak. Keep monitoring, and re-check after the next heavy rain.
Keep a simple log: date, tank gauge reading, outdoor temperature, and any symptom you noticed. Two or three weeks of entries will tell you more about whether consumption is abnormal than any single reading.
What Homeowners Should Not Do to “Check”
- Do not open the tank, remove the gauge, or loosen fittings to look inside.
- Do not dig test holes around an underground tank. Hand-dug holes can spread contamination and are not a substitute for proper soil borings.
- Do not pour water, soap, or dye into the tank or soil to “see where it goes.”
If you cannot rule out a leak with observation alone, the next step is professional testing, tightness testing for the tank itself, soil sampling for the surrounding ground, or both. That is the only way to move from “probably fine” to a documented answer.
Odor plus a persistent stain plus unexplained consumption is the combination that most reliably points to a real leak. Any one of the three on its own usually has an innocent explanation, but any one of the three is also enough reason to call a licensed professional rather than wait.
Frequently Asked Questions
How do I know if my oil tank is leaking?
Watch for strong oil odors around your property, wet or damp spots near the tank location, or unexplained increases in heating oil consumption. You may also notice discolored or oily soil. If you spot any of these signs, contact a professional for a tank tightness test or soil sampling to confirm a leak before it spreads contamination.
What are the warning signs of an underground oil tank leak?
Key warning signs include persistent oil smells in your yard or basement, wet spots or oil stains on soil, unusually high heating oil usage without increased heating demand, and visible rust or corrosion on above-ground tank components. Damp patches that don’t dry after rain or discolored vegetation can also indicate soil contamination from a leaking underground storage tank.
How can I find a buried oil tank on my property?
Start by checking your property deed, old home inspection reports, or utility records. Look for fill pipes, vent pipes, or gauge sticks protruding from the ground. Ask your fuel oil company for records of past deliveries. If you still can’t locate it, hire a professional to perform a ground-penetrating radar (GPR) scan, which can detect buried tanks without excavation.
What should I do if I suspect an oil tank leak?
First, stop using the heating system if possible to prevent further oil loss. Keep people and pets away from the affected area. Contact your fuel oil company and a licensed environmental contractor immediately. Do not attempt cleanup yourself. Report the spill to your local environmental agency. A professional will conduct soil sampling and determine cleanup requirements based on contamination levels.